教程来源于菜鸟:https://www.runoob.com/django/django-form.html
一、Django 表单
HTML表单是网站交互性的经典方式。 本章将介绍如何用Django对用户提交的表单数据进行处理。
1. HTTP 请求
HTTP协议以”请求-回复”的方式工作。客户发送请求时,可以在请求中附加数据。服务器通过解析请求,就可以获得客户传来的数据,并根据URL来提供特定的服务。
a GET 方法
我们在之前的项目中创建一个 search.py 文件,用于接收用户的请求:
1 | from django.http import HttpResponse |
在模板目录 templates 中添加 search_form.html 表单:
1 | <!DOCTYPE html> |
urls.py
1 |
|


b POST 方法
上面我们使用了 GET 方法,视图显示和请求处理分成两个函数处理。
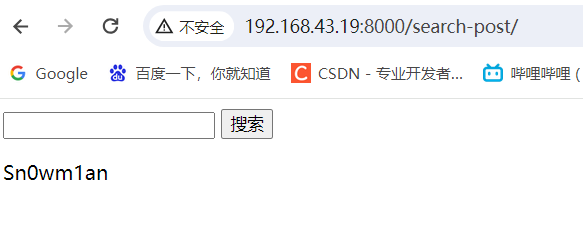
提交数据时更常用 POST 方法。我们下面使用该方法,并用一个URL和处理函数,同时显示视图和处理请求。
我们在 templates 创建 post.html:
1 | <!DOCTYPE html> |
在模板的末尾,我们增加一个 rlt 记号,为表格处理结果预留位置。
表格后面还有一个 { csrf_token } 的标签。csrf 全称是 Cross Site Request Forgery。这是 Django 提供的防止伪装提交请求的功能。POST 方法提交的表格,必须有此标签。
在HelloWorld目录下新建 search2.py 文件并使用 search_post 函数来处理 POST 请求:
search2.py
1 | # -*- coding: utf-8 -*- |
usrls.py
1 | from django.contrib import admin |

目前我们的目录结构为
1 | . |
c Request 对象
每个视图函数的第一个参数是一个 HttpRequest 对象,就像下面这个 runoob() 函数:
1 | from django.http import HttpResponse |
HttpRequest对象包含当前请求URL的一些信息:
| 属性 | 描述 |
|---|---|
| path | 请求页面的全路径,不包括域名—例如, “/hello/“。 |
| method | 请求中使用的HTTP方法的字符串表示。全大写表示。例如:if request.method == ‘GET’: do_something()elif request.method == ‘POST’: do_something_else() |
| GET | 包含所有HTTP GET参数的类字典对象。参见QueryDict 文档。 |
| POST | 包含所有HTTP POST参数的类字典对象。参见QueryDict 文档。服务器收到空的POST请求的情况也是有可能发生的。也就是说,表单form通过HTTP POST方法提交请求,但是表单中可以没有数据。因此,不能使用语句if request.POST来判断是否使用HTTP POST方法;应该使用if request.method == “POST” (参见本表的method属性)。注意: POST不包括file-upload信息。参见FILES属性。 |
| REQUEST | 为了方便,该属性是POST和GET属性的集合体,但是有特殊性,先查找POST属性,然后再查找GET属性。借鉴PHP’s $_REQUEST。例如,如果GET = {“name”: “john”} 和POST = {“age”: ‘34’},则 REQUEST[“name”] 的值是”john”, REQUEST[“age”]的值是”34”.强烈建议使用GET and POST,因为这两个属性更加显式化,写出的代码也更易理解。 |
| COOKIES | 包含所有cookies的标准Python字典对象。Keys和values都是字符串。 |
| FILES | 包含所有上传文件的类字典对象。FILES中的每个Key都是标签中name属性的值. FILES中的每个value 同时也是一个标准Python字典对象,包含下面三个Keys:filename: 上传文件名,用Python字符串表示content-type: 上传文件的Content typecontent: 上传文件的原始内容注意:只有在请求方法是POST,并且请求页面中 |
| META | 包含所有可用HTTP头部信息的字典。 例如:CONTENT_LENGTHCONTENT_TYPEQUERY_STRING: 未解析的原始查询字符串REMOTE_ADDR: 客户端IP地址REMOTE_HOST: 客户端主机名SERVER_NAME: 服务器主机名SERVER_PORT: 服务器端口META 中这些头加上前缀 HTTP_ 为 Key, 冒号(:)后面的为 Value, 例如:HTTP_ACCEPT_ENCODINGHTTP_ACCEPT_LANGUAGEHTTP_HOST: 客户发送的HTTP主机头信息HTTP_REFERER: referring页HTTP_USER_AGENT: 客户端的user-agent字符串HTTP_X_BENDER: X-Bender头信息 |
| user | 是一个django.contrib.auth.models.User 对象,代表当前登录的用户。 |
如果访问用户当前没有登录,user将被初始化为django.contrib.auth.models.AnonymousUser的实例。
你可以通过user的is_authenticated()方法来辨别用户是否登录:
if request.user.is_authenticated():
# Do something for logged-in users.
else:
# Do something for anonymous users.
只有激活Django中的AuthenticationMiddleware时该属性才可用 |
| session | 唯一可读写的属性,代表当前会话的字典对象。只有激活Django中的session支持时该属性才可用。 |
| raw_post_data | 原始HTTP POST数据,未解析过。 高级处理时会有用处。 |
| | |
二、视图
视图层
一个视图函数,简称视图,是一个简单的 Python 函数,它接受 Web 请求并且返回 Web 响应。
响应可以是一个 HTML 页面、一个 404 错误页面、重定向页面、XML 文档、或者一张图片…
无论视图本身包含什么逻辑,都要返回响应。代码写在哪里都可以,只要在 Python 目录下面,一般放在项目的 views.py 文件中。
每个视图函数都负责返回一个 HttpResponse 对象,对象中包含生成的响应。
视图层中有两个重要的对象:请求对象(request)与响应对象(HttpResponse)。
1.请求对象: HttpRequest 对象(简称 request 对象)
以下介绍几个常用的 request 属性。
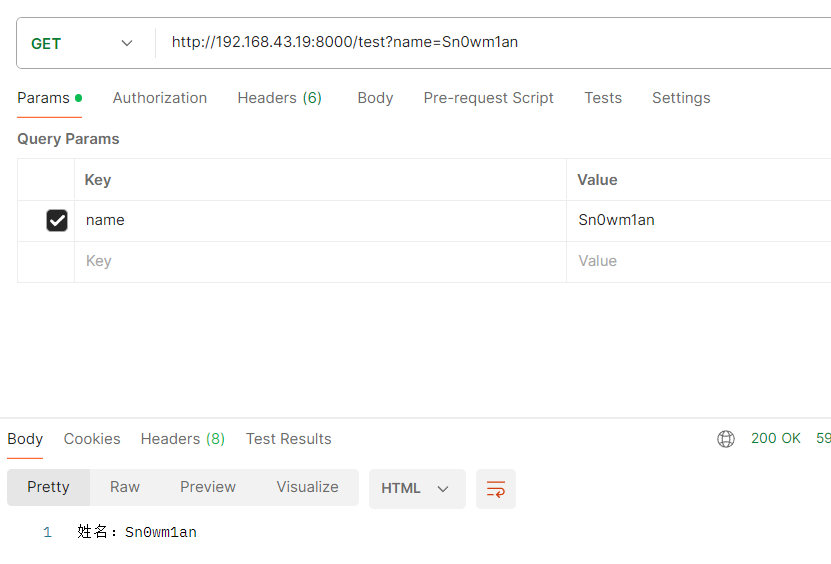
a GET
数据类型是 QueryDict,一个类似于字典的对象,包含 HTTP GET 的所有参数。
有相同的键,就把所有的值放到对应的列表里。
取值格式:对象.方法。
**get()**:返回字符串,如果该键对应有多个值,取出该键的最后一个值。
views.py
1 | def runoob(request): |
b POST
数据类型是 QueryDict,一个类似于字典的对象,包含 HTTP POST 的所有参数。
常用于 form 表单,form 表单里的标签 name 属性对应参数的键,value 属性对应参数的值。
取值格式: 对象.方法。
**get()**:返回字符串,如果该键对应有多个值,取出该键的最后一个值。
1 | def runoob(request): |
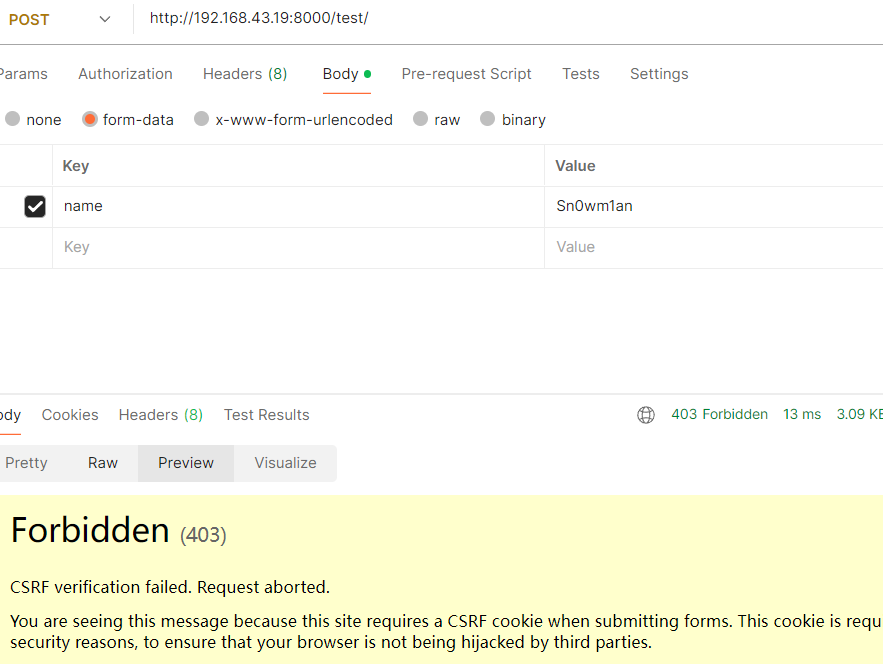
问题:Forbidden
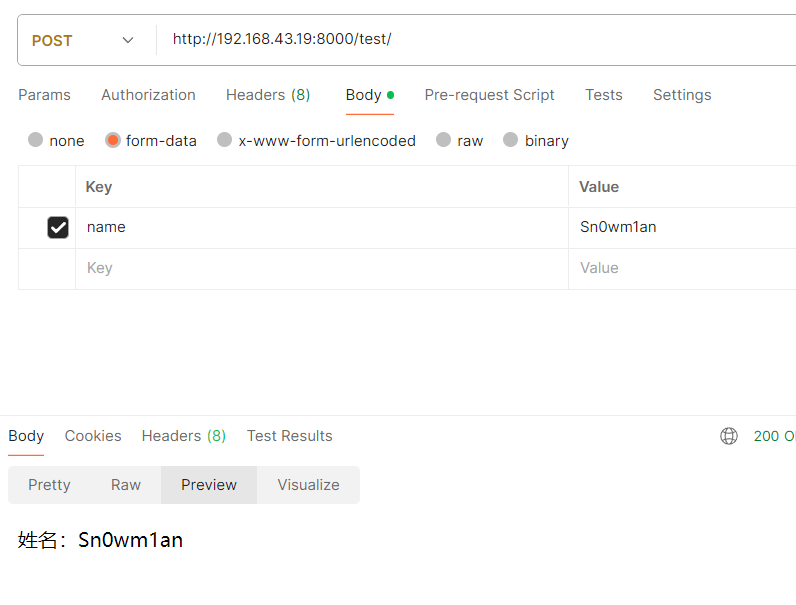
这是因为POST请求是需要CSRF认证的,所以在我们目前的代码中要禁用CSRF认证
1 | from django.views.decorators.csrf import csrf_exempt |
问题解决
c body
数据类型是二进制字节流,是原生请求体里的参数内容,在 HTTP 中用于 POST,因为 GET 没有请求体。
在 HTTP 中不常用,而在处理非 HTTP 形式的报文时非常有用,例如:二进制图片、XML、Json 等。
1 | def runoob(request): |
d path
获取 URL 中的路径部分,数据类型是字符串。
1 | def runoob(request): |

2 响应对象:HttpResponse 对象
响应对象主要有三种形式:HttpResponse()、render()、redirect()。
HttpResponse(): 返回文本,参数为字符串,字符串中写文本内容。如果参数为字符串里含有 html 标签,也可以渲染。
1 | def runoob(request): |
render(): 返回文本,第一个参数为 request,第二个参数为字符串(页面名称),第三个参数为字典(可选参数,向页面传递的参数:键为页面参数名,值为views参数名)。
**redirect()**:重定向,跳转新页面。参数为字符串,字符串中填写页面路径。一般用于 form 表单提交后,跳转到新页面。
1 | def runoob(request): |
render 和 redirect 是在 HttpResponse 的基础上进行了封装:
- render:底层返回的也是 HttpResponse 对象
- redirect:底层继承的是 HttpResponse 对象
三、Django 路由
路由简单的来说就是根据用户请求的 URL 链接来判断对应的处理程序,并返回处理结果,也就是 URL 与 Django 的视图建立映射关系。
Django 路由在 urls.py 配置,urls.py 中的每一条配置对应相应的处理方法。
Django 不同版本 urls.py 配置有点不一样,这里只看2.2.X后的版本
- path:用于普通路径,不需要自己手动添加正则首位限制符号,底层已经添加。
- re_path:用于正则路径,需要自己手动添加正则首位限制符号。
1 | from django.urls import re_path # 用re_path 需要引入 |
1. 正则路径中的分组
a 正则路径中的无名分组
无名分组按位置传参,一一对应。
views 中除了 request,其他形参的数量要与 urls 中的分组数量一致。
urls.py
1 | urlpatterns = [ |
views.py
1 | from django.shortcuts import HttpResponse |

2正则路径中的有名分组
语法
1 | **(?P<组名>正则表达式)** |
有名分组按关键字传参,与位置顺序无关。
views 中除了 request,其他形参的数量要与 urls 中的分组数量一致, 并且 views 中的形参名称要与 urls 中的组名对应。
1 | urlpatterns = [ |
1 | from django.shortcuts import HttpResponse |
成功读取到数据


a 路由分发(include)
存在问题:Django 项目里多个app目录共用一个 urls 容易造成混淆,后期维护也不方便。
解决:使用路由分发(include),让每个app目录都单独拥有自己的 urls。
步骤:
- 1、在每个 app 目录里都创建一个 urls.py 文件。
- 2、在项目名称目录下的 urls 文件里,统一将路径分发给各个 app 目录。
1 | from django.contrib import admin |
在manage.py文件夹下创建子文件夹
1 | python manage.py startapp app01 |
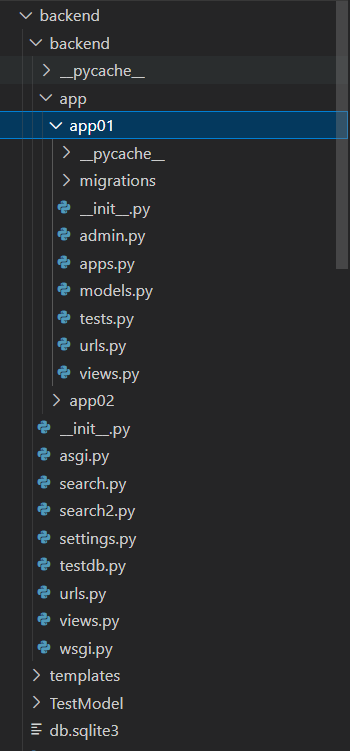
在各自 app 目录下,写自己的 urls.py 文件,进行路径跳转。
我的习惯是把新写好的路由放到app文件夹里面去如下图
app01 目录:
1 | from django.urls import path,re_path |
app02 目录:
1 | from django.urls import path,re_path |
app01下的views.py
1 | from django.shortcuts import render |
为什么会自动翻译

2, 反向解析
随着功能的增加,路由层的 url 发生变化,就需要去更改对应的视图层和模板层的 url,非常麻烦,不便维护。
这时我们可以利用反向解析,当路由层 url 发生改变,在视图层和模板层动态反向解析出更改后的 url,免去修改的操作。
反向解析一般用在模板中的超链接及视图中的重定向。
普通路径
在 urls.py 中给路由起别名,**name=”路由别名”**。
1 | path("login1/", views.login, name="login"), |
在views.py里面
1 | from django.urls import reverse |
html
1 | <!DOCTYPE html> |


